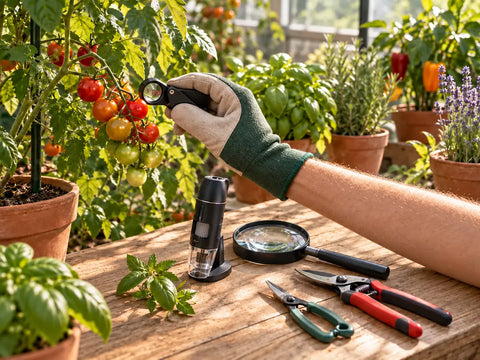
The best harvest date is usually a window, not a single perfect day. A seed packet, plant tag or breeder schedule can tell you when to begin looking, but the plant itself gives the final answer. Color, size, firmness, aroma, stem condition and surface details all help reveal whether a crop is immature, ready or beginning to pass its peak.
The most dependable approach is to combine several signals instead of trusting only the calendar. Check more than one fruit, flower or branch, compare what you see with the expected traits of that crop and cultivar, and consider the weather and how you plan to use or store the harvest.
For details too small to see clearly, explore our microscopes and magnification tools. A compact AC Infinity jeweler's loupe can help with quick field checks, while our harvest supplies help you prepare for clean, careful cutting and handling.
Start With the Expected Harvest Window
Days to maturity is a planning estimate. Depending on the crop, the count may begin at seeding, transplanting or flowering, and real plants do not grow on an identical schedule. Light, temperature, water, nutrition, root health, pollination and cultivar all affect development. Use the listed date as a reminder to start inspecting, not as an automatic command to cut.
· Review the cultivar description. Note its expected mature color, size, flavor, texture and approximate harvest timing.
· Mark the calendar. Begin checking several days before the estimated date, especially during hot, wet or rapidly changing weather.
· Inspect representative samples. Check different sides of the plant and both the upper and lower canopy.
· Decide how the crop will be used. Produce for immediate eating, drying, storage or transport may be harvested at different points within the maturity window.
The Six Signals of Harvest Readiness
1. Color
Learn the mature color for the exact cultivar. Peppers may be usable while green or allowed to reach their final red, orange, yellow or purple color. Melons often shift from green toward cream or yellow beneath the surface netting. A color change is valuable evidence, but it should agree with other signs.
2. Size and Shape
Mature produce generally reaches the typical size and shape described for the variety. Bigger is not always riper: vegetables left too long may become fibrous, seedy or tough. Compare several specimens rather than choosing the largest one as your only reference.
3. Firmness and Surface Texture
Ripening can soften some fruit, while storage crops often develop a hard, durable rind. Cantaloupe netting becomes raised and rough; winter squash skins toughen. Use gentle pressure only. Repeated squeezing can bruise produce and introduce decay.
4. Aroma and Flavor
Many aromatic herbs and fruits become noticeably fragrant near peak maturity. When sampling is safe and appropriate, a small taste can reveal sweetness, bitterness, tenderness or full flavor more reliably than size alone. Never taste an unknown plant or material showing mold, rot or pest contamination.
5. Stems, Tendrils and Plant Behavior
Some crops advertise readiness at the attachment point. A ripe cantaloupe may release from the vine with gentle pressure; the tendril nearest a watermelon may dry and brown. Onion tops fall over as bulbs finish. These clues are crop specific, so verify the expected signal before relying on it.
6. Magnified Surface Details
A loupe or handheld microscope reveals small features the naked eye can miss: gland development, surface color, pest eggs, webbing, mildew, mold filaments and physical damage. Magnification is especially useful for flowers and aromatic crops, but it does not replace whole-plant assessment.
Harvest Cues by Crop Type
|
Crop |
Useful readiness signals |
Important note |
|
Tomatoes |
Expected mature color; fruit gives slightly to gentle pressure; full flavor and aroma |
Pick earlier if cracking, frost or transport is a concern. |
|
Peppers |
Mature size and firmness; harvest green or allow full cultivar color |
Clip with sharp shears rather than pulling the branch. |
|
Cantaloupe |
Raised netting, green-to-yellow background shift, fragrance and easy slip from the vine |
Melons ripen unevenly, so check them individually. |
|
Watermelon |
Drying tendril, dull or rough surface and creamy-yellow field spot |
Use several signals; thumping alone is unreliable. |
|
Leafy greens |
Tender, usable leaf size before plants become tough or bolt |
Harvest outer leaves first when the crop supports repeat picking. |
|
Culinary herbs |
Strong aroma and healthy foliage; many are best for drying just before flowers open |
Harvest after dew dries and handle gently to protect oils. |
|
Roots |
Expected shoulder diameter and color; sample one root to judge texture |
Do not wait for every root to match exactly. |
|
Onions and garlic |
Mature bulbs with naturally declining or fallen tops |
Curing and storage needs differ from immediate-use crops. |
|
Pumpkins and winter squash |
Full cultivar color, hard rind and mature, corky stem |
Cut with stem attached and harvest before a hard freeze. |
|
Aromatic flowering crops |
Expected flower maturity, aroma, gland development and whole-plant condition |
Use cultivar guidance and compare several sites under magnification. |
How to Use a Loupe or Microscope
A stable view matters more than extreme magnification. Our microscope and magnification collection includes options for quick checks and closer inspection. A lighted 30x/60x jeweler's loupe is portable enough to compare several areas without removing much material.
1. Stabilize the sample. Turn off strong fans and support the stem or fruit without squeezing it.
2. Use clean optics and good light. Built-in LEDs help, but avoid glare that washes out color.
3. Start at lower power. Find and focus on the area before switching to higher magnification.
4. Check several locations. Compare upper, middle and lower growth, plus the interior and exterior of representative samples.
5. Record what you see. Take a photo when possible and compare it with the same cultivar two or three days later.
6. Combine the result with whole-plant signals. Calendar timing, aroma, color, plant health and weather still matter.
What Magnification Can and Cannot Tell You
· It can reveal whether tiny surface glands are mostly clear, opaque or changing color, when that is a recognized maturity cue for the crop.
· It can expose hidden pest activity, mildew, mold filaments or damaged tissue before material enters storage or drying.
· It cannot provide one universal color rule for every plant. Gland appearance varies by crop, cultivar, lighting and sample location.
· It cannot make contaminated material safe. Isolate and discard moldy, rotten or pest-compromised material according to appropriate guidance.
The Clear, Cloudy and Amber Question
Growers of some resin-bearing flowering crops use changes from clear to cloudy or amber-colored surface glands as one part of a harvest decision. Treat this as a crop- and cultivar-specific observation, not a universal formula. Inspect the productive flower surface rather than relying only on nearby leaves, compare multiple locations, and use the breeder's guidance plus whole-plant maturity. The goal is a representative pattern, not finding one gland of a particular color.
A Five-Minute Harvest Readiness Check
1. Confirm the window. Is the plant near the cultivar's expected maturity range?
2. Look at the whole plant. Note color, vigor, fading, disease, weather damage and uneven development.
3. Choose representative samples. Do not judge the crop from the earliest or largest specimen alone.
4. Check crop-specific cues. Compare size, color, firmness, aroma, rind, stem or tendril condition with the expected signs.
5. Inspect closely. Use a loupe or microscope when surface glands, pests or disease are part of the decision.
6. Review the forecast and your workflow. Heat, heavy rain, frost and labor availability may shift the safest harvest day.
7. Harvest a small test batch when practical. Evaluate flavor, texture, aroma and post-harvest behavior before taking the entire crop.
When to Harvest Early - or Wait
|
Decision |
Typical reasons |
|
Harvest a little early |
Hard frost, prolonged rain, splitting, animal pressure, advancing disease or material intended for transport |
|
Harvest now |
Several crop-specific cues agree and the crop has the color, texture, aroma or surface maturity you want |
|
Wait and recheck |
Only the calendar says it is ready, color is incomplete, fruit is undersized or representative samples disagree |
|
Harvest in stages |
Different fruits, branches or canopy levels are maturing at different rates |
Staggered harvesting is normal. Peppers and melons do not all ripen together, herbs can often be cut repeatedly, and indoor flowering plants may mature unevenly across the canopy. Taking only the ready portion can protect quality while the rest continues developing.
Prepare Before You Cut
Gather clean containers, labels and the appropriate harvest supplies before starting. Use sharp scissors or hand tools to make controlled cuts instead of tearing stems or twisting fruit from fragile branches.
· Harvest during the coolest practical part of the day, after surface moisture or dew has dried.
· Wear gloves for hot peppers, irritating sap, sharp foliage or crops that readily transfer oils and resins.
· Sanitize cutting surfaces and tools according to their care instructions, and avoid laying clean harvests on soil.
· Keep damaged, diseased or questionable material separate from healthy produce.
· Move the crop promptly into the correct washing, cooling, drying, curing or storage workflow.
Common Harvest-Timing Mistakes
|
Mistake |
Why it causes trouble |
Better approach |
|
Following the calendar alone |
Weather and plant health change development |
Use the date to begin inspections, then require several matching plant cues. |
|
Checking only one location |
Top growth may mature sooner than shaded or lower growth |
Inspect multiple representative sites and harvest in stages if needed. |
|
Assuming bigger means better |
Overgrown produce can become tough, seedy or less flavorful |
Use the cultivar's expected size plus texture and flavor. |
|
Using one visual cue |
Color may shift before texture, aroma or internal quality |
Confirm readiness with at least two or three independent signals. |
|
Handling too aggressively |
Squeezing, pulling and dull tools bruise or tear tissue |
Support stems and use clean, sharp tools. |
|
Ignoring the forecast |
Frost, heavy rain and heat can damage a nearly mature crop |
Balance peak maturity with the risk of leaving it outside. |
|
Storing before inspection |
Hidden pests, dampness or rot can spread |
Use magnification and good light; separate questionable material. |
Frequently Asked Questions
Should I harvest exactly on the listed day?
No. Days to maturity is an estimate and may be counted from seeding, transplanting or flowering. Start checking around that date, then let crop-specific color, size, texture, aroma and plant cues guide the decision.
What magnification is best for checking plants?
A lighted loupe in the 30x to 60x range is convenient for quick surface checks. A handheld digital microscope can provide a larger screen and photographs for comparison. Stable positioning, clean optics and representative sampling matter more than chasing the highest possible number.
Should I check leaves or flowers under the microscope?
Inspect the plant part you intend to harvest. Nearby leaves may mature differently and can give a misleading impression. Compare several productive sites from different parts of the plant.
Can I harvest part of a plant and leave the rest?
Often, yes. Many vegetables, herbs and flowering plants mature unevenly and support staged harvests. Use clean cuts and avoid damaging growth that still needs time. Follow crop-specific guidance because not every plant responds the same way.
Is cloudy weather a reason to delay harvest?
Not by itself. Consider maturity, surface moisture, disease risk and the forecast. If several readiness signals agree, waiting through prolonged damp weather may create more risk than benefit. Harvest when the crop surface is dry whenever practical.
What if I find mold during the readiness check?
Stop and isolate the affected material. Do not blend it into the healthy harvest or assume trimming will make it safe. Inspect surrounding growth carefully, sanitize tools and surfaces, and follow crop-appropriate disposal and food-safety guidance.
Let the Plant - Not Just the Calendar - Decide
A confident harvest decision comes from agreement. The expected date puts you in the right neighborhood; the plant's color, size, texture, aroma, attachment cues and magnified details tell you when you have arrived. Observe several locations, document what you see and use a small test harvest whenever practical.
Get a clearer view with our microscopes and magnifiers, then prepare for clean, efficient cutting with the right harvest tools and supplies. The more consistently you record your observations, the easier it becomes to recognize the ideal window for that cultivar in your own garden.
Sources and Further Reading
· University of Minnesota Extension - Growing peppers in home gardens
· University of Minnesota Extension - Growing melons in the home garden
· University of Minnesota Extension - Growing pumpkins and winter squash in home gardens